Thanks Jed ! I wanted to post a bit more about the log workflow Alex mentioned in his first post. I understand it is not as Photoshop friendly as an ICC profile but I know it would be helpful to some artists and students. We will start this workflow in Nuke and then move to Photoshop.
-
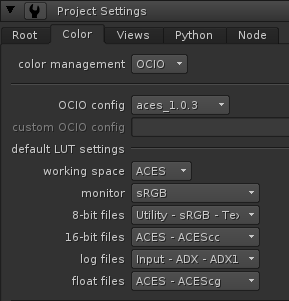
First, we will set Nuke in ACES.
-
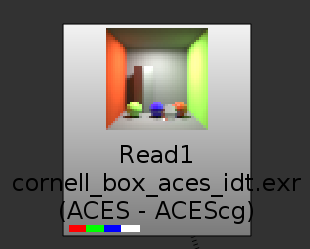
Let’s read an ACEScg render in Nuke.
-
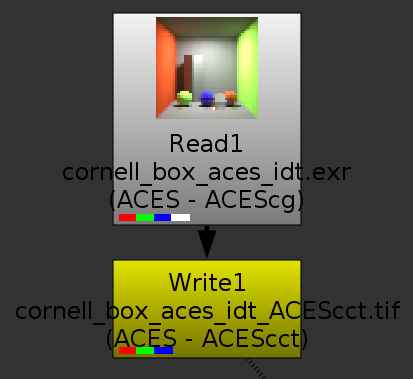
Let’s write it as a 16 bits tiff in ACEScct. (It could be ACEScc, based on your preferences. Have a look at this post if you want to know more on the topic)

-
We can read our output to make sure it matches our render.
-
We can now open this tif file in Photoshop. I recommend a recent version of Photoshop like CC because we had some issues with CS6. The image looks grayish wich is normal since its transfer function is now logarithmic.
-
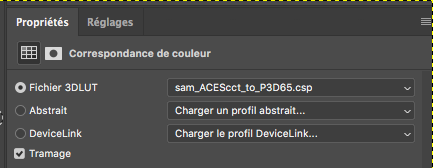
We can now create a Colour Lookup Layer in Photoshop to load a csp file for display. This csp file needs to be set on your Display Transform. In our case, it is P3D65 (ACES). But it could be Rec. 709 (ACES) or sRGB (ACES) for example.
-
Thanks to the csp file the tif now matches what we had in Nuke but within a 0-1 range which is perfect to paint in Photoshop.
-
You can save a 16bit tif from Photoshop after disabling the Colour Lookup Layer and go back to Nuke.


I know it is not a perfect workflow but I think it is an easy workaround for artists who are not familiar with ICC profiles like myself. 
Thanks !