What it does
The ACES > ICC sRGB Kit lets you convert sequences from ACES to ICC sRGB in a useable way. The colours are closer to the original appearance than if you try to get actual sRGB out of Nuke. The output of this kit lets you use your sequences in tools like FinalCut Pro X, Motion, Compressor and so on. Basically everything that can’t do ACES which would be the majority of apps out there at the moment. The “Kit” right now just consists of two transforms for reasons stated above. I had made 3 setups for all of the ACES spaces and with the exception of ACEScc they all came out looking the same. ACEScc’s conversion ended up slightly more saturated for some reason.
Disclaimer: I’ve recreated this set way too many times as Affinity Photo (AppStore + Beta) has a bug in the way macro sets are treated. It has a penchant for destroying them and then its Library. Two items seem to work fine though. Also I got tired of redoing them and this works well enough for now as a testing ground.
Disclaimer 2: Don’t put this under tools, this is more of a test stage right now.
How to use it
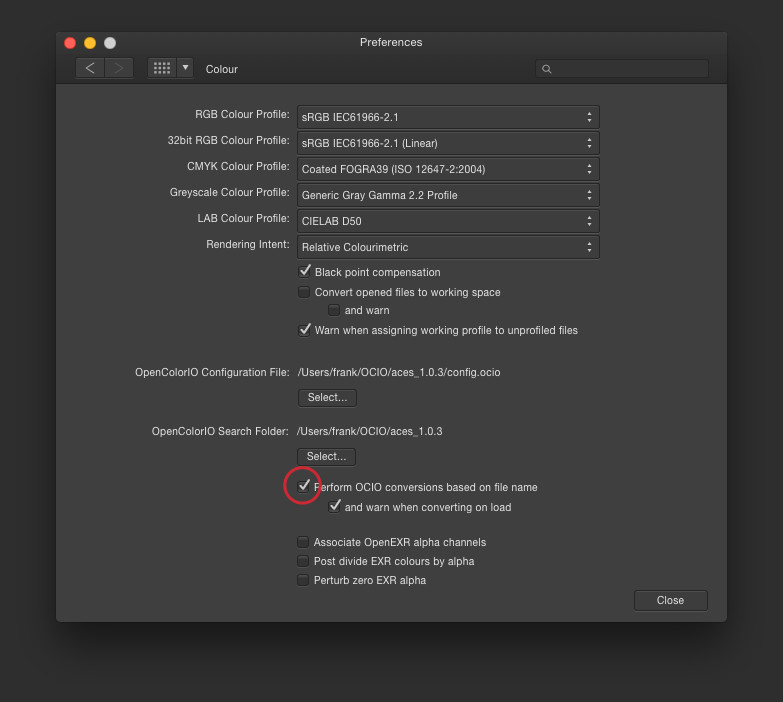
Once you’ve set up Affinity Photo for OCIO (Settings, set config.ocio, set folder where LUT folder is in — a sandboxing issue, it’s the same folder as the config.ocio is in) set it to perform the conversions by file name.
I’m using sequence.####.acescg.exr for this as a Nuke file out. Once I’ve converted my sequence I just remove the .acescg from the files via the Finder’s rename multiple items tool.
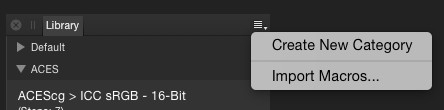
Now open the Library panel, click the stack icon and import the .afmacros file. You’ll see a new category getting added and a plethora of… two items.
That’s enough of that.
In the New Batch Job dialogue, select ACES under Available Macros and pick from the abundance of options. Only apply one though, otherwise it’ll look weird. Before the OK button okays OK you need to set the Save into: option. In the example below I picked PNG because I wanted small-ish files and 16-Bit. The macro converts down from 32-Bit float to 16-Bit linear.
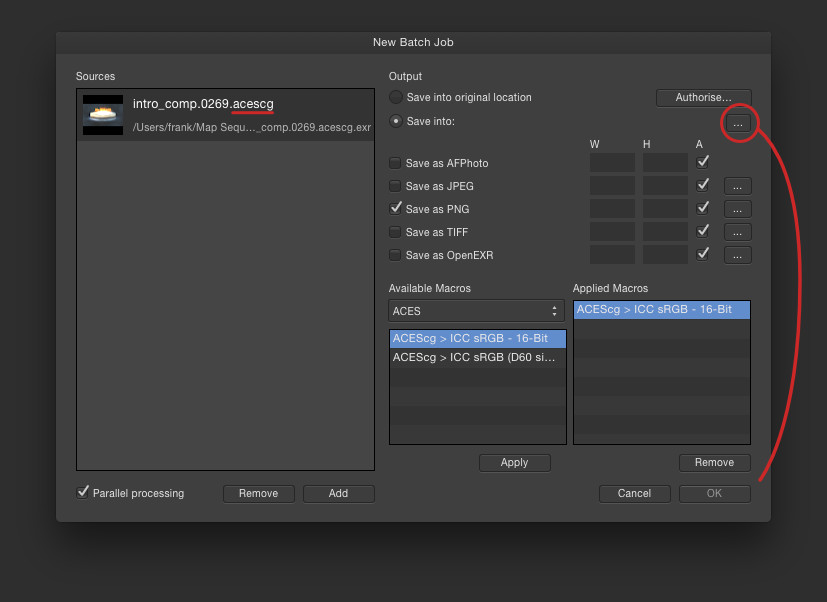
The ... buttons give you the options for each export format. A just means keep aspect ratio you may want to leave that alone.
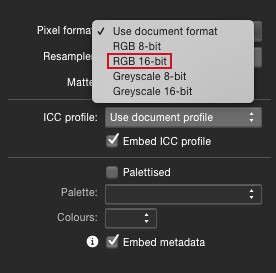
Example PNG setting of my example file.
Notes
You may wonder why to set Affinity to recognise the source for conversion. Disable it and you’ll see. If it’s enabled it does a transform from e.g. ACEScg to scene_linear with a linear sRGB ICC space. To see the macros work in a single document, set the “32-Bit Preview” from OCIO to ICC.
What is happening?
There are two OCIO nodes in sequence (ACEScg to Output - sRGB) followed by (Utility - Curve - sRGB to ACES2056-1). Previewing that in OCIO will look wonko while previewing that in ICC looks fine. Before the conversion to 16-Bit, the macro bakes it all down. Then, to be safe it sets the colour profile to sRGB (just in case the user has another default profile set up).