Not really specific to ACES but currently I’m grading a project with clips captured on an FX9 with some extremely high speculars on sunglasses. It looks like I’m dealing with negative values here as well which I can’t mittigate with a gamut compressor.
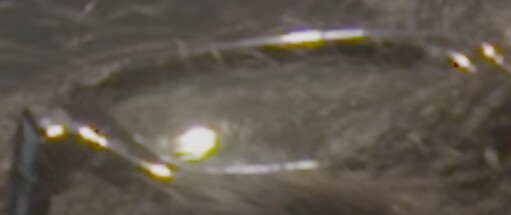
This is the source material viewed raw. Is there a ‘grading way’ to deal with this in Resolve?
Our other options would be to paint those nasties out I guess but that’s extra work.
I also didn’t know that this could happen in camera already
There is no guarantee that the “Raw” image of a motion picture camera will not exhibit any negative values.
Let me explain: Typically this image will have already received a white-balancing + matrix transformation. There is a good reason for that: White-balancing must happen before demosaicing and the weights computed affect the matrix transformation. Contrary to what you can access with a DSLR, it is rare with a motion picture camera to have access to the actual Raw image that was acquired by the imaging sensor.
Now because of the aforementioned matrix transformation, anything like chromatic aberration or noise is a potential source of negative values as those might not fit in the implicit gamut.
I’m not sure which software you are using but if there is a tool to remove chromatic aberration, it might help reducing those artefacts.
I recall @jedsmith has some Nuke voodoo to deal with this. Hoping he might be able to offer some wisdom here. (Closing my eyes tightly and wishing for Jed to appear)
Interesting. I always thought that the A/D conversion would register only within the camera’s native gamut. I now remember older BMD cameras having this black sun issue where they had to add a fix for in Resolve on the Raw tab. Is that a similar issue? Still learning a lot here .
The A/D conversion happens early, before almost anything else: For a CMOS sensor, once light hits a pixel photodiode, it is converted to an electric charge. That charge is amplified and then the Analog to Digital Converter (ADC) converts it to digital pixel value. All those image pixels are then white-balanced, and demosaiced.
Note that depending on the sensor type, e.g. CCD vs CMOS and the vendor, their might be some minute differences but the process at the basics is roughly as described.
If you are grading in DI at the end, one approach might be to
use a little toe to raise just the base blacks slightly so 99% of the negative pixels are fixed,
use an expression to catch any other negative pixels ( that should be miliscule), and invert them.
then use an inverted mult (invert/mult/invert) to sit the base black back (if it’s visually noticeable)
this destructive process is fine at DI stage, but I wouldn’t do this to earlier in the pipeline without extensive testing. Some cameras (or film) hold detail in the grain in these very dark areas of the image, and you can’t lose this.