Preserving Logo/Product colors in CG_Rendering/Reshift

Hello,
we are struggling with the following issue:
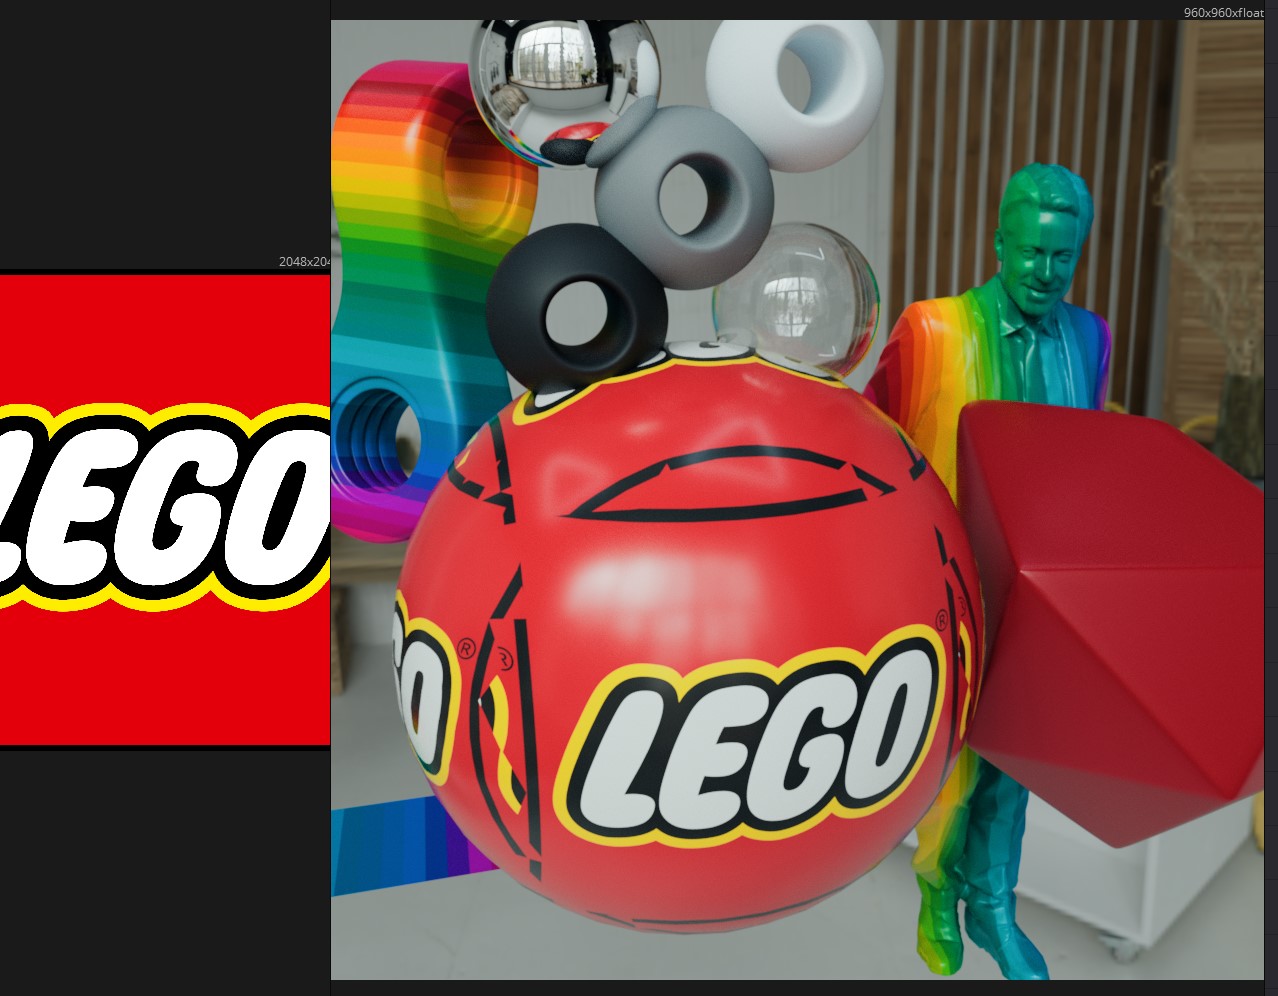
Customer wants the exact color values in the product renders, that are used for the print of the packaging.
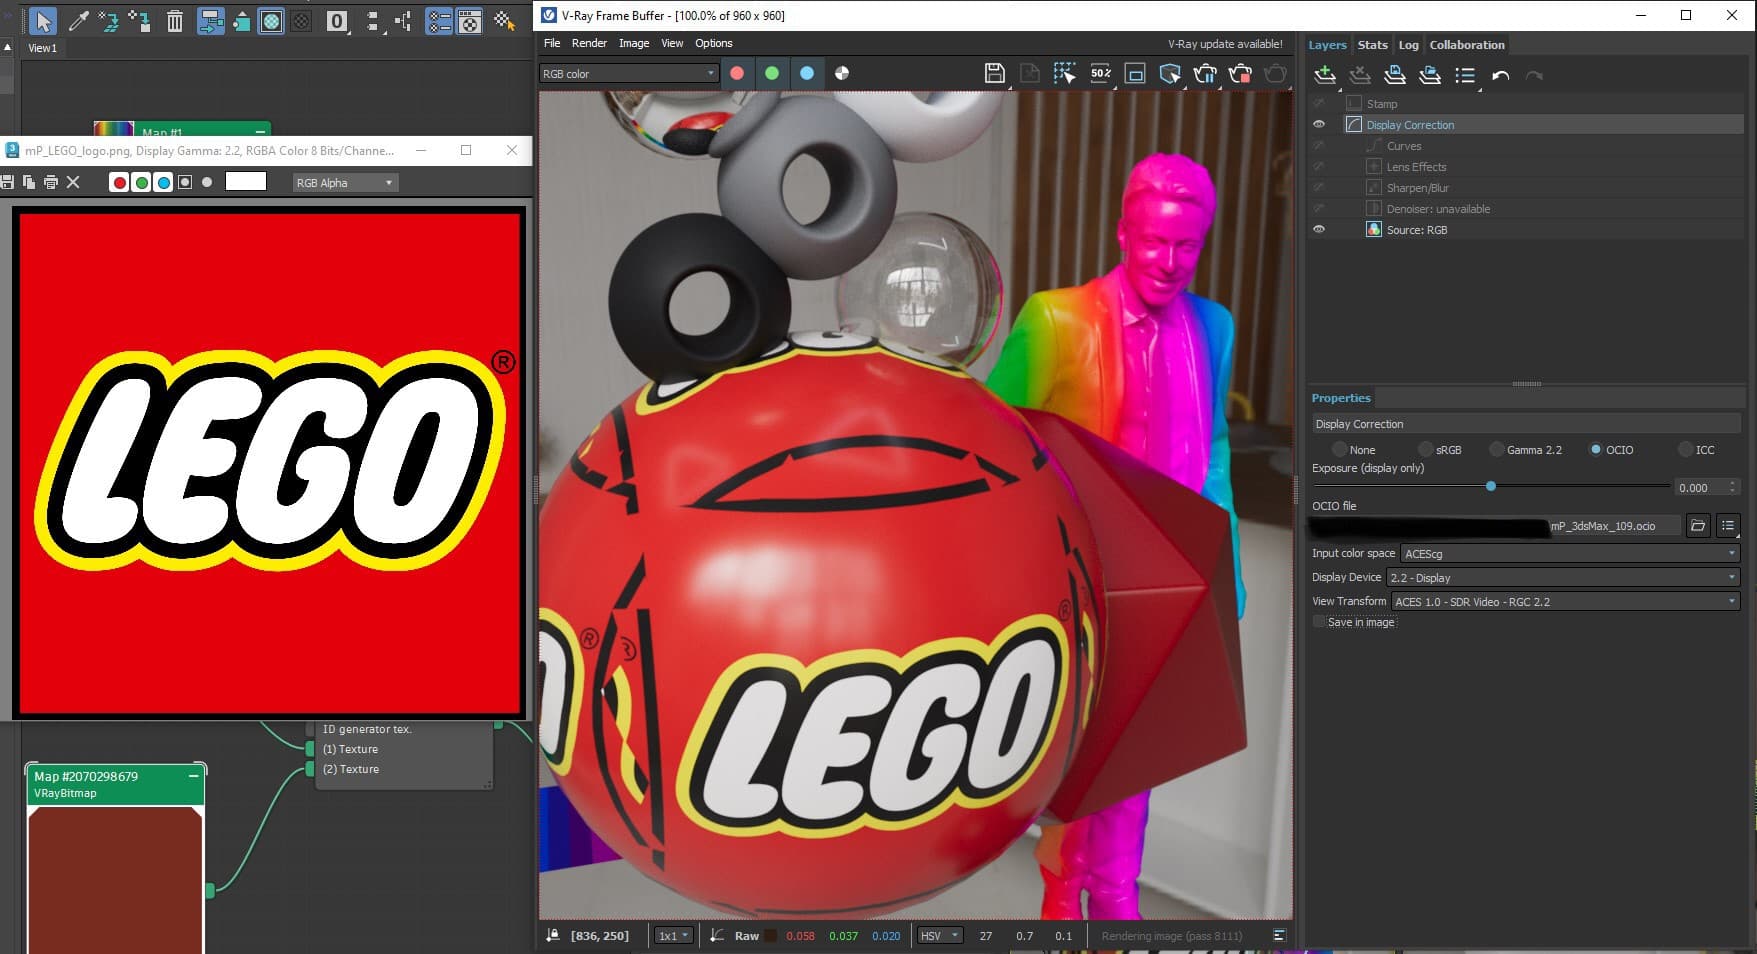
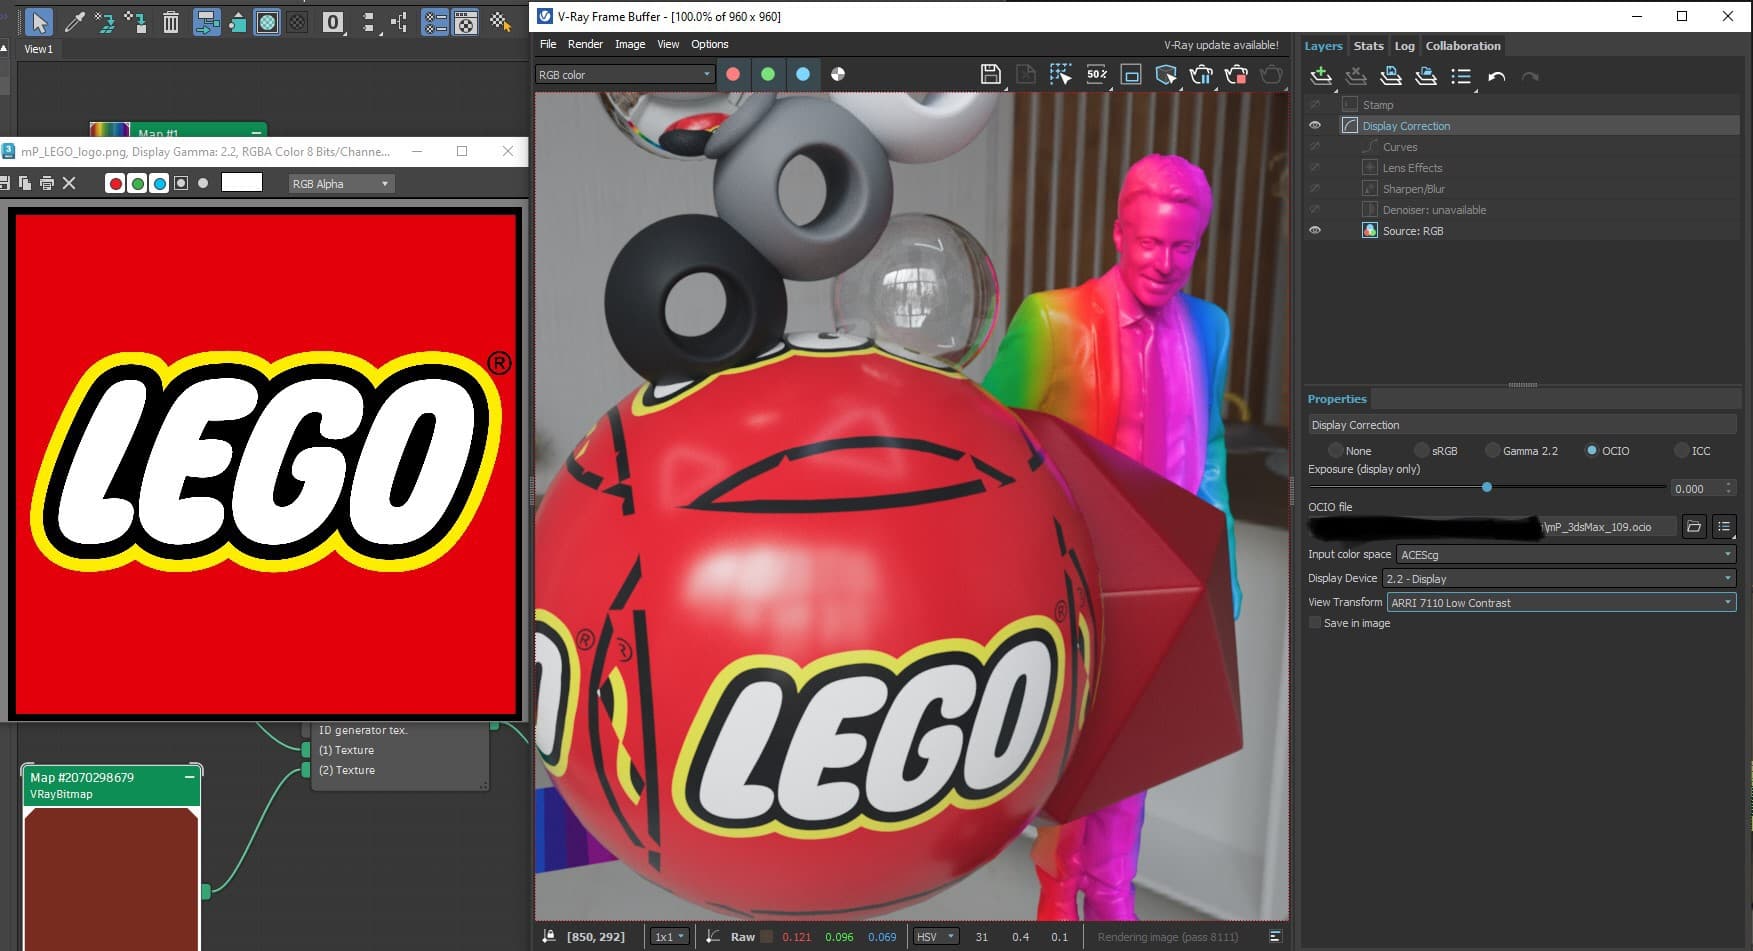
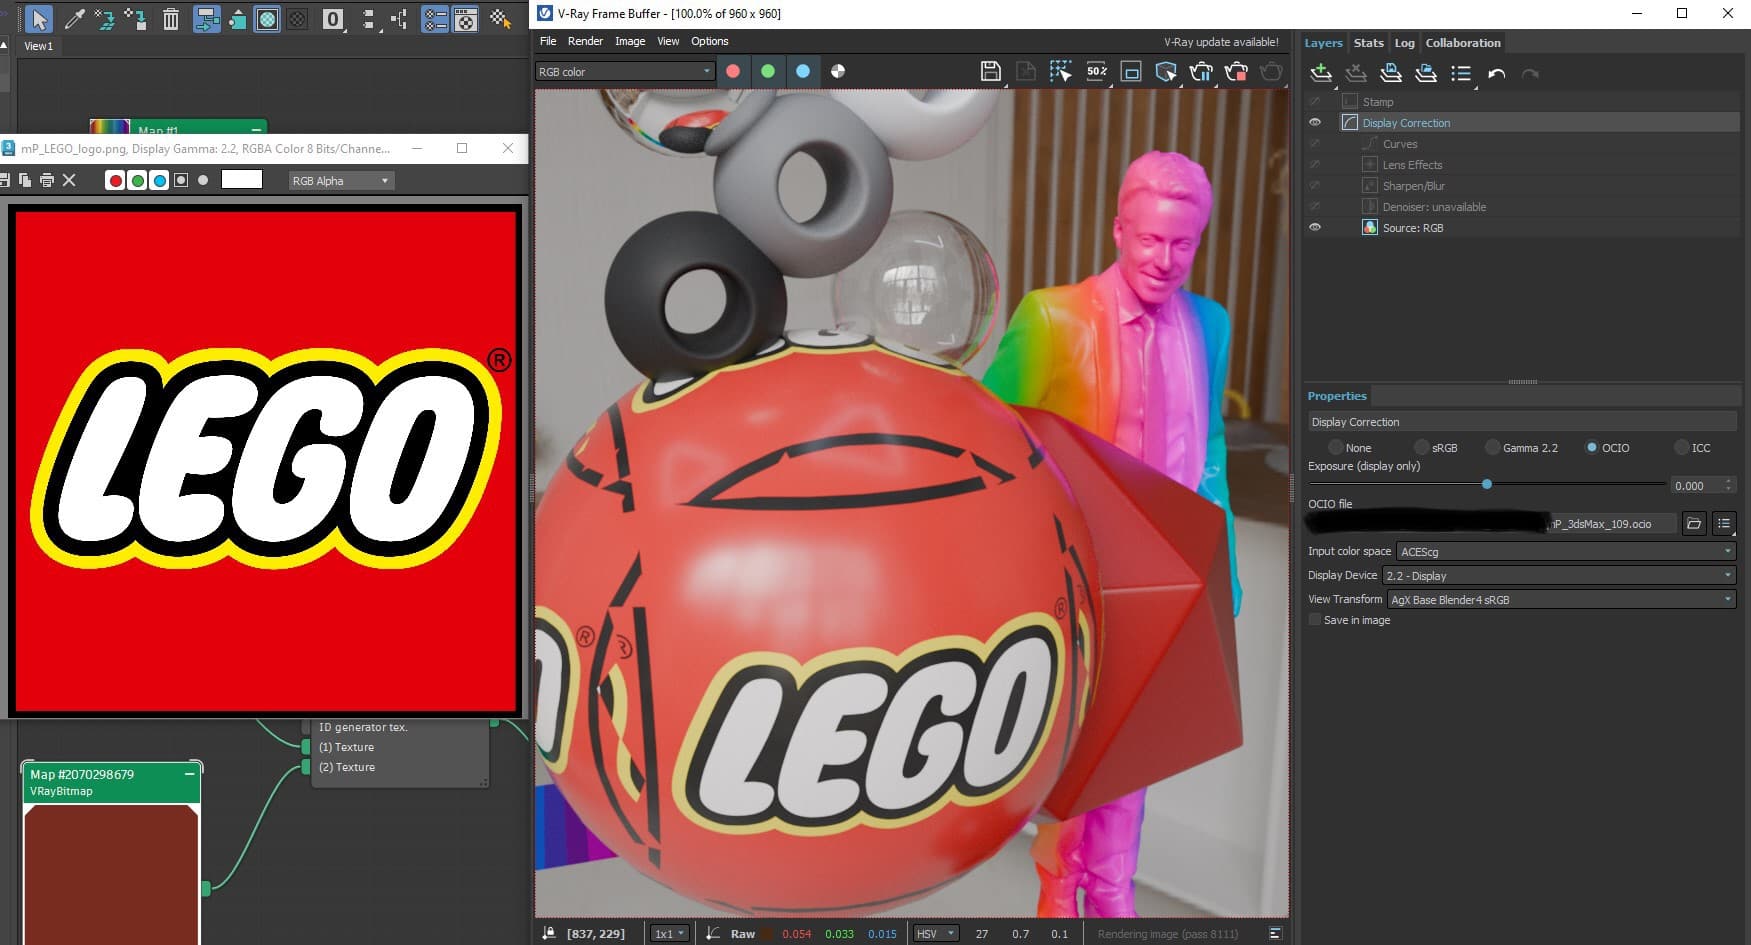
Most colors are fine, but those that are close to values of 1, in our cause pure white and a yellow (#FFDD00), come out more dull out of the redshift renders. I do understand why this is the case, as Aces and Redshift are trying to emulate the behaviour of light in the real world, where the font on the packaging would also not be pure white, unlike the original photoshop file as seen on a screen.
Stlil, customer is king, so what would be the smoothest workflow to have the renders closer to the color values? I am aware that they cannot be exactly the same, as these values are on the edge of the srgb color space which would lead to clipping. But how can we get it closer in the most smooth way?

I am working with Redshift in Houdini, and then Nuke or Photoshop.
I have tried:

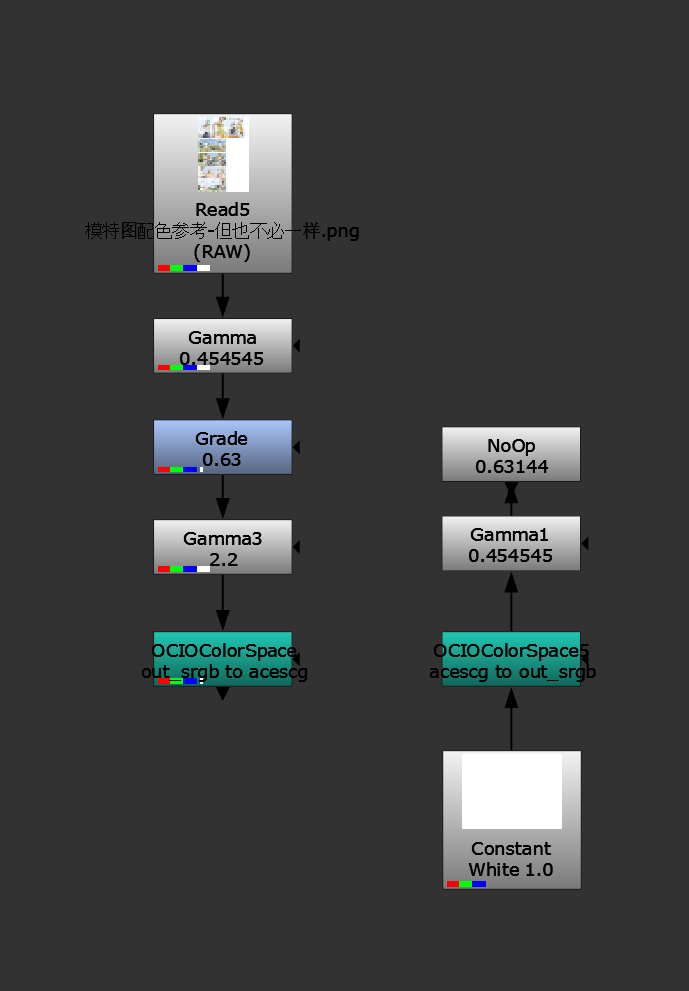
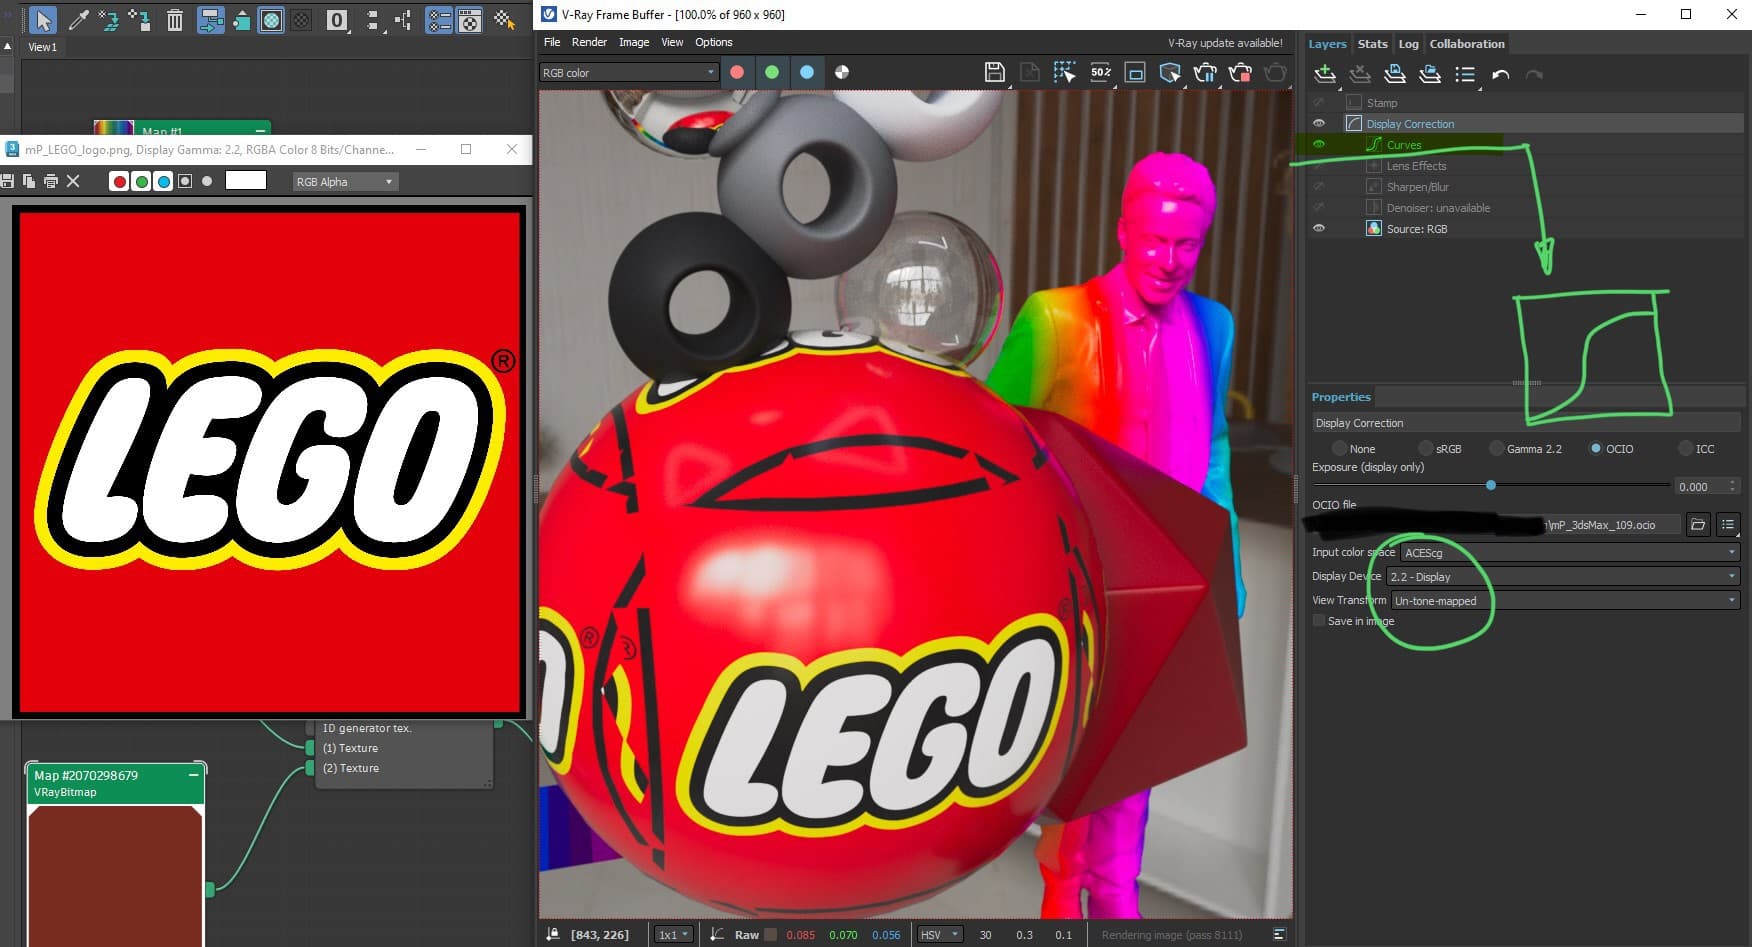
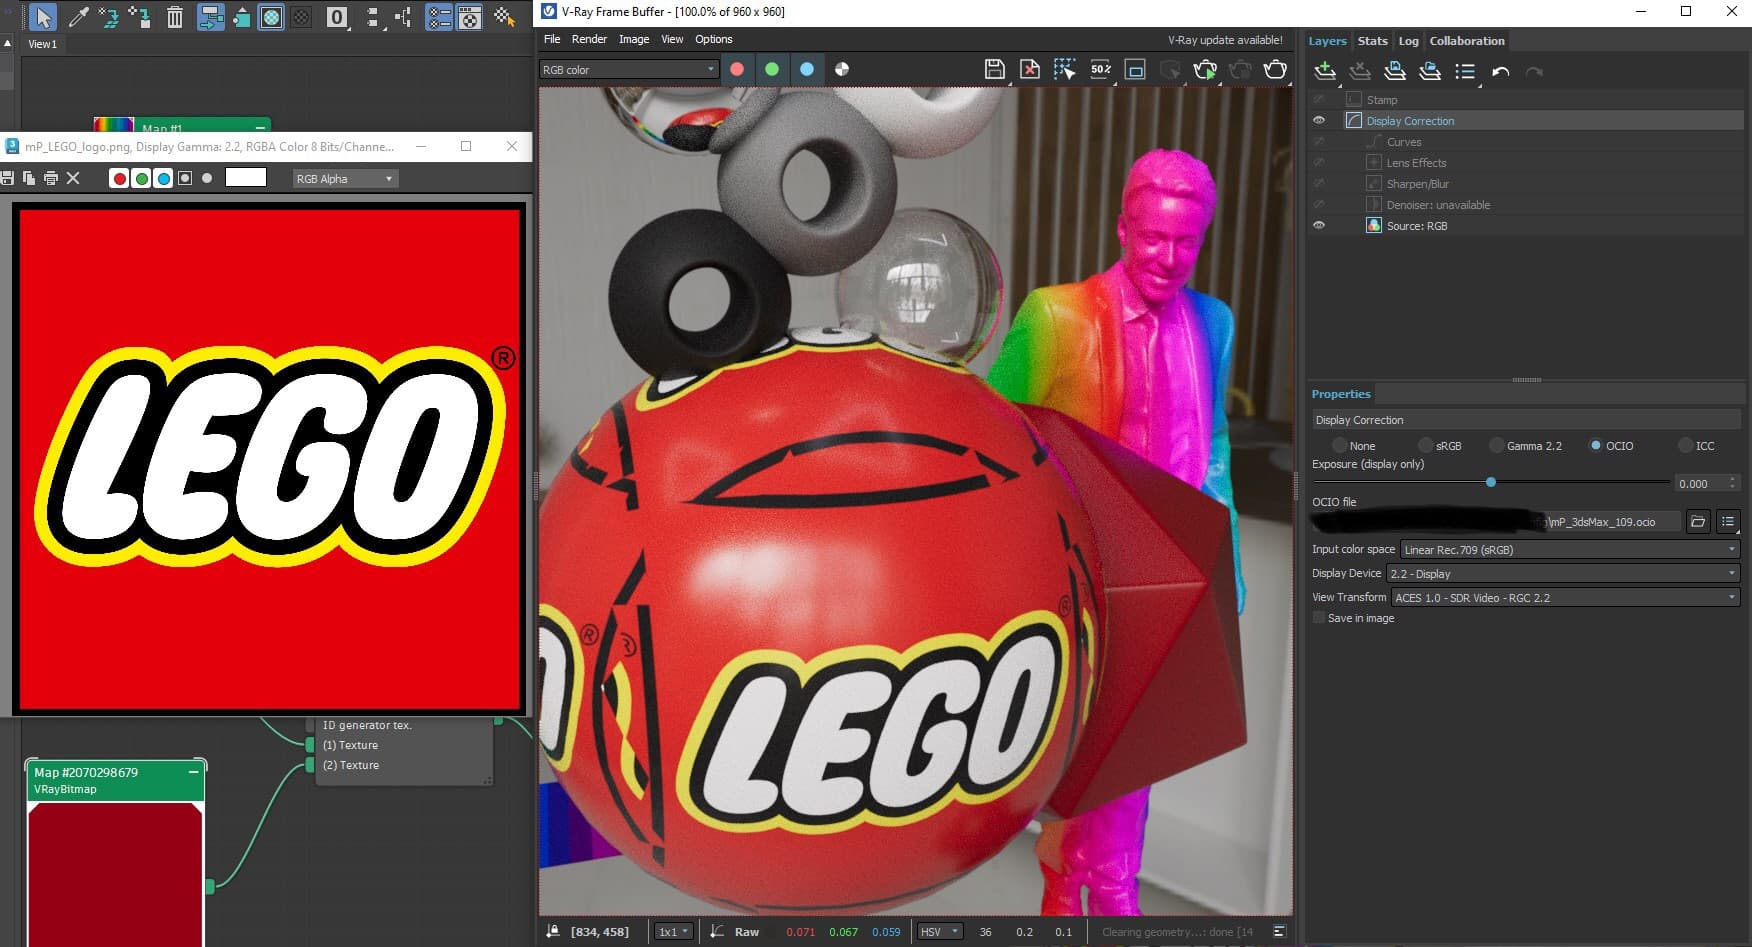
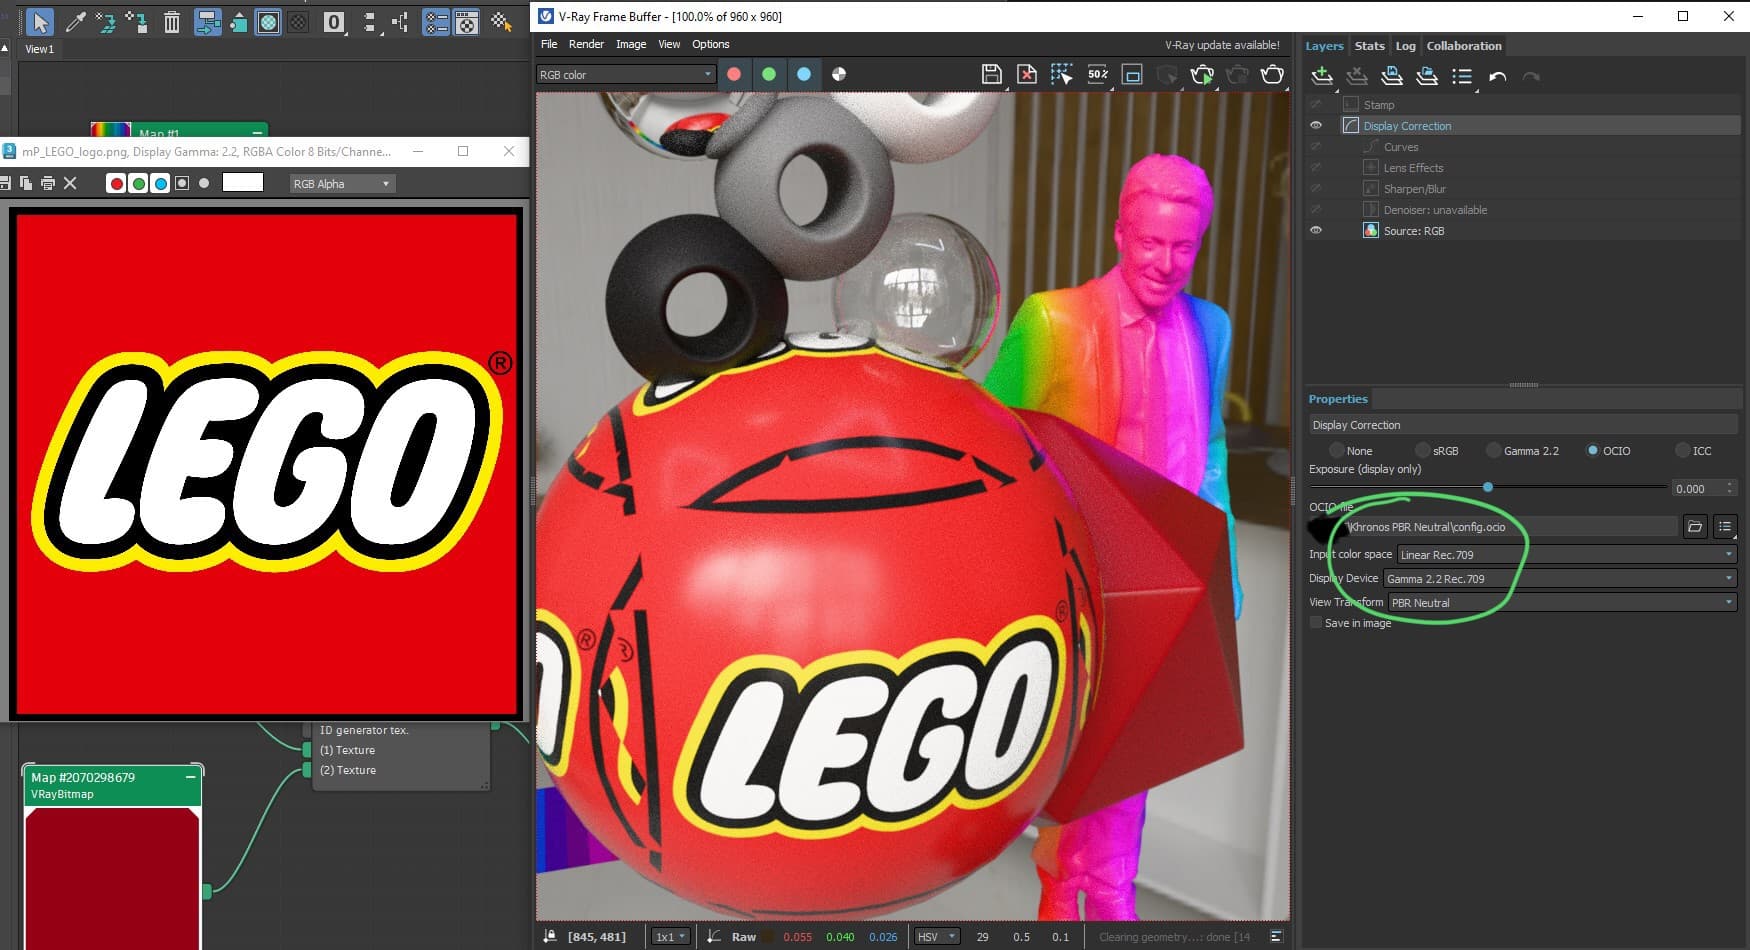
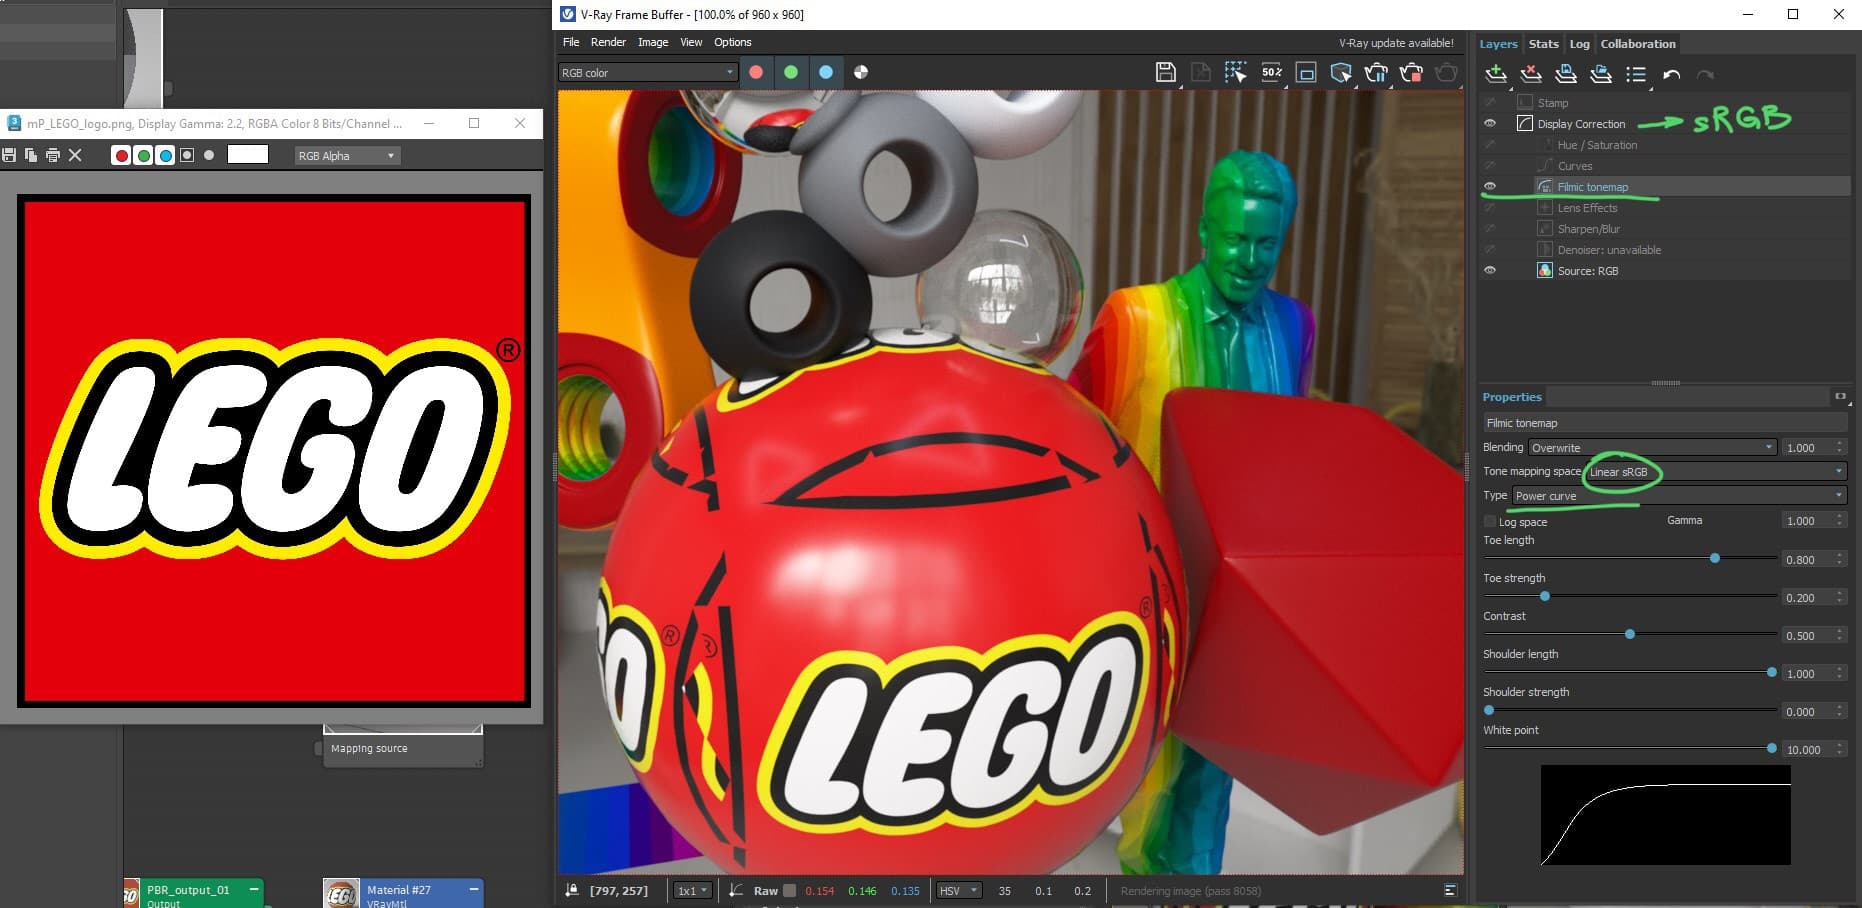
  1. playing around with color spaces. Using the psd files (they’re set to RGB) with the srgb idt or converting first to exrs from Utility-SRGB-Texture to AcesCG (using Nuke) with the AcesCG idt in Houdini. Both lead to the same results. If I convert the textures from Output srgb to let’s say AcesCG, I infact get almost the same color values that the original picture has, but it likes super wrong as the white font has now a value of 16, which makes it basically into a lightbulb. Everything looks just really weird. Anyways, from all my research I came to the conclusion that the first two ways are correct.

  2. Try to color grade the texture before so the result is closer.

  3. Grade it after rendering to match colors. (So far the best results)

  4. Playing with lighting to get a better match.

How do I make the client happy?

Best regards and thanks a lot,

oliver

We’ve been struggling with similar issues on more “motion graphics-y” projects, trying to combine CG renders with a lot of client sRGB elements like packaging textures, logos and animations. I’ve tried to identify workflow alternatives, largely coming up with the same ones, but nothing seems really optimal for this kind of situation:

- Convert client images using “sRGB - Texture”, comp until it looks OK, then fix everything in grade -
Unfortunately for these types of projects there’s rarely any time/money for a proper grade session, let alone one where you can sit and colorpick values to make sure all the blues are “client blue” and all the yellows are “client yellow.” Clients are used to sRGB workflows where everything looks right immediately.

- Convert images using “sRGB - Texture”, output using the sRGB ODT, fight the ODT in comp -
By default all the elements will likely be too dark and compressed, so you’ll probably have to manipulate diffuse passes in comp to reverse what the RRT/ODT is doing. Tricky to get it correct enough manually, and the potential for mismatching looks is high with multiple artists working on different shots. Especially when artists might not, and probably shouldn’t have to be, as well-versed in the under-the-hood workings of ACES.

- Convert images using the inverse sRGB ODT, output using the sRGB ODT -
Images will generally look as expected, but as mentioned, 100% white in the input image is now at 16 in ACES, which is hardly ideal. Motion blur and DOF won’t look good, reflections might be too strong, sharp alpha edges will get aliased. You also won’t get out anything close to a 100% yellow without manual tweaking.

- Convert images using “sRGB - Texture”, output using “sRGB - Texture” -
This more or less brings us back to our pre-ACES days. Render passes and parts of the comp with strong highlights will need to be manually softclipped, you’ll have to make sure comp operations designed for linear HDR values still look decent and don’t go above 1, and so on. Also artists will now have to keep track of what kind of ACES project it is, which is not ideal.

I was thinking of trying out some kind of “halfway HDR” compromise workflow, see how that turns out. Basically convert images using the inverse sRGB ODT, but with a slightly lowered brightness in sRGB space before that, so 100% white only stretches up to around 3.5 in ACES. That might be a bit nicer to work with than 16, if you use that transform as output then maybe it’s enough range to avoid the worst highlight clipping without having to think about it in comp, and if you use the standard sRGB ODT, 100% white in will still come out as ~95% white, which might be close enough to get away with for renders that are going to have some variation due to lighting/shading anyway.