Valid C4D Redshift After Effects ACES workflow?

Hi Everyone!

I’m hoping to get some feedback on my current Cinema4D Redshift to After Effects ACES workflow. So far I think what I have here is working and was about to record a tutorial using this workflow, but I’m still trying to wrap my head around some of the concepts so any corrections or clarifications would be extremely helpful. Thanks so much!

Cinema 4D Settings:
Project settings: Linear Workflow enabled and Input Color Profile – sRGB
Render Settings: I’m saving my files out as 16bit Float EXR with Image Color Profile drop down set to sRGB.

Redshift Settings:
While using the Redshift Renderview I have Color Management Global set to OCIO Display Mode and the OCIO Config pointed to my aces_1.2 config file. View transform set to “sRGB (ACES).

Any color textures I’m using in my scene I’ve pre-converted to ACEScg (Utility sRGB Texture ->ACEScg) EXRs using PYCO ColorSpace Converter. Any HDRIs I’m using have been converted in PYCO to EXRs (Utility Linear sRGB -> ACEScg).
Lights in my scene are set to Color mode (not temp) and I’ve just selected a color to taste based on what I’m seeing in my RS Renderview.

Rendering out of C4D:
Right before rendering out to Cinema 4D’s picture viewer I uncheck the “Enabled” check box under Color Management in the Redshift Post-Effects section of C4D’s Render Settings.
-The image renders out looking like a blown out linear image; which is what I would expect.

After Effects Settings:
Project Settings – Color – Depth 32bits; Working Space sRGB; Linearize Working Space Checked on.
I import my EXR from Cinema4D and don’t change any color settings. (Interpret Footage – Color Management – Preserve RGB Unchecked)
Under View Menu – ‘Use Display Color Management’ checked ON
I then make 4 Adjustment Layers on top of my EXR in the timeline so it looks like this:

  1. sRGB to Linearized sRGB – (FX - Color Profile Converter: Input Profile sRGB, Output Profile sRGB Linearized Checked ON)

  2. OCIO ACEScg to Output sRGB (FX – OpenColorIO – aces_1.2 Config, Input Space ACEScg, Output Space Output sRGB)

  3. Color Correction – (FX – Exposure, Curves, Etc.)

  4. OCIO Raw to ACEScg (FX – OpenColorIO – aces_1.2 Config, Input Space Utility Raw*, Output Space ACEScg)

  5. EXR From Cineme4D – (no FX applied)

Using this workflow With no Color Correction applied in the 3rd After Effects layer, I get what looks to be exactly what I’m seeing in the Redshift Renderview with OCIO Aces(sRGB) turned on. In After Effects I can go to Composition – Save Frame As – and export a JPG with no additional settings changed (color management tab of Output Module Settings is default Preserve RGB Unchecked) and get the same results. So it seems to be working as expected.

I have a hard time understanding all the things After Effects is doing as far as color management so I tried to come up with a workflow that would keep most AE settings to their default, or at least the way I usually work in After Effects. I’m sure when I’m sleep deprived working on a project I would forget to disable some sort of color management, not click a “Preserve RGB” checkbox or something so I wanted to workflow where I didn’t have to do any of that.

*Why does Input Space Utility Raw get the desired results? I would think that Input-Linear-sRGB would be the correct IDT, but that results in very desaturated colors.

So any thoughts on this? Have I completely botched anything here? Anything to watch out for using this workflow?

Thanks so much in advance for taking a look at this! I’ve learned so much on this forum so thank you to all for being so helpful!!
Hello and Welcome Zak.
Unfortunately I am not familiar with C4D and AE neither so i cannot really help you on these points.
Overall it looks like you output a result that is excepted so it should work.I didn’t know the trick sRGB to Linearized sRGB so After can still apply the transfer function himself and be happy.

Some notes:

OCIO Raw to ACEScg

This is equivalent to a “no-operation” so you can remove it.

I uncheck the “Enabled” check box under Color Management in the Redshift Post-Effects

Not sure it is needed. I think in the Redshift Render settings you can just tell him to not apply any post effect on exported files, unless it works differently in C4D

I’ve pre-converted to ACEScg (Utility sRGB Texture ->ACEScg)

Maybe you just didn’t precise it but there is not only HDRIs that need to use Utility-Linear-sRGB, if your source has a linear-transfer function it should be treated as such. So for any EXR, if no colorspace is specified, you can assume it’s sRGB and probably wrote using a linear transfer function so you will need to use Utility-Linear-sRGB.

Hope you will find someone that knows how C4D colormanagement work to confirm your workflow.
Cheers.

Liam.

1 Like

Hi Liam,

Thanks so much for the reply! And thanks for taking a look at this workflow. Yeah, it seems to be working fine but I’m just a bit skeptical. I’ll throw some other examples at it and see if it holds up.

Ah! Right. Yes, this used to be Utility-Linear-sRGB to ACEScg" which is what I assumed would be correct, but wasn’t. Changing this to Utility RAW gave me what looked like correct results.

I think this is true, though I’d have to test it. I have been leaving “bloom” and “flare” Redshift Post FX on for these tests. I was surprised to see that even with these on, they were not clamping the output renders.

Ah, I see. Yeah, very good point. I’ll look through and make sure I haven’t made any incorrect sRGB assignments.

Thanks again for your help, Liam!
-zak

1 Like

Hi Zak,

I think your AE workflow is not entirely correct even though you might see proper results. To get a true linear workflow (also calculation wise) you have to set it up as follows:

  1. After Effects Project Settings → 32bit float, Working Space: ACEScg, Linearize Working Space - ON
    This will make sure you can use and interpret all the data that comes in.

  2. Under view menu → Use Display Colormanagement OFF
    You need to do this to get rid of AE’s crappy hidden management.

  3. Interpret Footage → Perserve RGB ON
    Again to make sure all the data is read and not managed by AE.

  4. Place adjustment layer on top with OCIO FX ACES 1.2 → ACEScg to Output sRGB

This setup should look the same as the RedShift viewer if it was also set for Output sRGB from ACEScg.
Now you can do all your fx between the footage and output transform.
From here you can output to whatever you need. You can disable the ouput adjustment layer and render back out to ACEScg with Perserve RGB checked on export or just leave it on and output to still images or video formats.

And just to add…

Utility Raw is like Liam said a “no-operation”. Your EXRs data was already stored in ACEScg so there was no need to convert it in the first place. Utility-Linear-sRGB would be the correct choice if you didn’t render in ACEScg but “the conventional way” where the primaries are those from sRGB. The gamut of ACEScg is much bigger (conveniently encompassing both rec.2020 and P3) hence the desaturation from the misinterpretation.

Best,

Shebbe

Hi Shebbe!

Thanks for the reply and taking a look at my workflow. A couple of questions:

What would be a situation where leaving it set to sRGB Linear would give inaccurate results? Maybe comping a solid layer with a color over my EXR? I would think potentially this would cause an issue because I would be selecting a color based on my viewable sRGB space and not typing out ACEScg color values. Otherwise I’m not sure what calculations would be incorrect. Thoughts on this?

I did a test and brought in a multiplass EXR from Cinema 4d and comped it all back together using your method outlined above (ACEScg working space, Display color management off, Preserve RGB on for all even export). I exported this out as an sRGB 16bit TIFF file. I brought this back over to my my original AE file with the workflow from my original post. I made this TIFF the top layer and set the blend mode to ‘Difference.’ This resulted in a pure black comp. All color values were 0.000.
Is there another comping situation that I’m not thinking of where my workflow breaks down and gives incorrect results?

I know the method you described is the one being shared on forums and youtube. It works perfectly. I just find it so different and foreign to the way I’m used to working in After Effects that I wondered if I could keep my project settings and export settings to (pretty much) their defaults and make the conversions through adjustment layers that I could make sense of.

Thanks again for taking a look at this!
-zak

Hey Zak, thanks for trying it out!
I did the same test to check my sanity and while they may look similar to the eye they weren’t perfectly nulling at all.

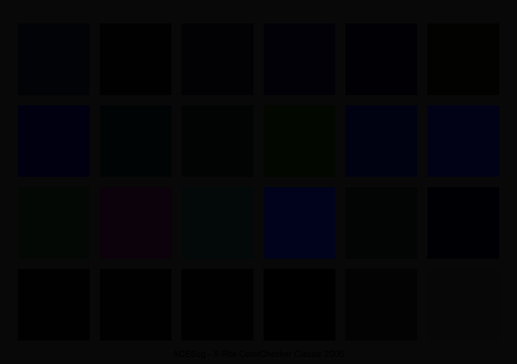
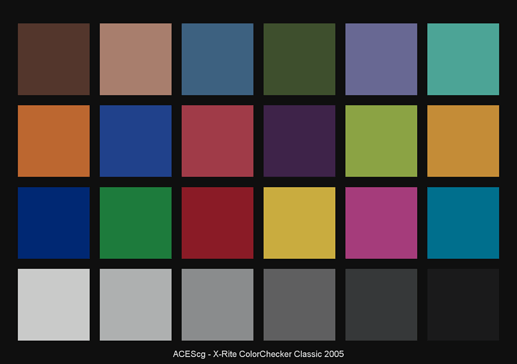
Here’s my result with one of the patches being a difference of 0,3,27 8bit srgb.

Also in normal viewing you could visually see the difference.

Your setup:

My setup:

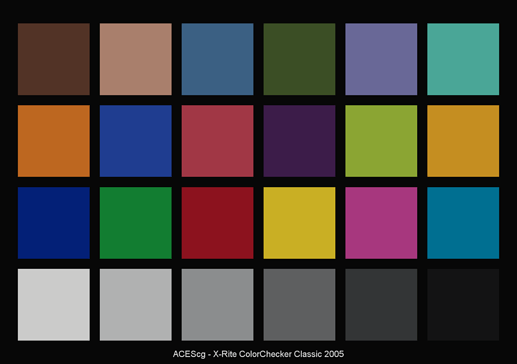
I used the xrite ACEScg checker which you can find here.

AE has always been a bit weird with it’s colormanagement but at least in my setup you know all your transformations are ACES based and not a mix of what AE does and what ACES does.
As for 32bit FX math, yes of course having linear checked will make calculations always linear but I think your pipeline from the ACEScg exrs to output isn’t fully what it’s supposed to be because AE is still managing some bits.

Not entirely. In both setups color-picking is based on viewing space unless we’d disable the ODT and any other layer transforming to output.

To be fair I’m not super technical on these matters, maybe I did something wrong instead so I can’t really tell why you did get a null but I didn’t. My workflow which I got from this video just feels like it makes much more sense as to being completely ACES managed instead of AE managed.

If you have any other findings worth sharing I’d be happy to read them :slight_smile:

Hi Shebbe,

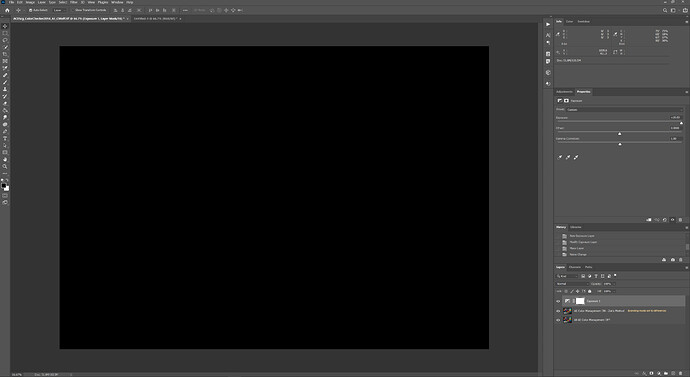
Thanks for your reply and giving this workflow a shot. I’ve tried almost a dozen times to replicate what you’re showing but I am unable to do so. My examples always result in null values when comparing the two methods. Here’s a screenshot of Photoshop with my method exported from After Effects on top of your method exported from After Effects. I have the blend mode on my method set to difference. Even with an exposure layer on top with the exposure cranked to +20, the values of the pixels are still 0.

I am exporting out of After Effects as 16bit Tiffs. I found even when exporting out using the same method, 8 bit exports showed differences between files that should be identical. Perhaps the 8bit exports were the problem?

I think there are 2 schools of thought regarding ACES in After Effects; Disable all color management and export preserving RGB values, or working with color management on and making all the color transforms and gamma transforms using layers. As far as I know, one of them is not more correct than the other.

If you have examples of my workflow breaking down or not working, I’m all ears. But in all my tests I have yet to get inaccurate results.

Hey guys, sorry if someone already posted a similar reply and I missed it, but just a couple quick things.

  1. In regards to an ACEScg / ACEScc setup in After Effects, Casey Drogin breaks it down for you in this pdf, and it’s absolutely spot on.
    One thing to make note of, which may seem contrary to most AE-ACES tutorials out there, is that you DO NOT change your working color space to ACEScg. Rather, you set it to, or keep it set at, your native display colorspace, or rec709. You still want to set the bit depth to 32 bit float Linear, but by keeping your colorspace native to display and/or render color space, you ensure that what you are seeing on screen is an honest representation of color and value. Use adjustment layers to create your IDT - RRT/Grade - ODT sandwich and you’ll be in good shape. Also, his example uses standard ACES as the preferred grading space, which suits his pipeline. If you’re comping cgi renders or vfx elements, use ACEScg, or if it’s mostly color grading ACEScc is preferred. Link to pdf:

https://drive.google.com/open?id=1Y0c7Yo3QH4GK2tc0nRpy10in7Tq6iFD6

As far as Redshift in Cinema goes, you need to

  1. Convert any textures in your scene that are piped in to color channels (albedo, base color, diffuse and spec color, into ACEScg 16 bit half float exr files prior to render (there’s a few converters out there that can do this rather effortlessly. Any data based textures like normal, height, glossiness, etc, should be set to linear. Any HDRIs should be converted to 32bit

  2. render your animation out as a linear_sRGB exr sequence, 16 bit half float, zips compression. Make sure to turn OFF post effects and your OCIO display transforms from the IPR, since those adjustments will get baked in to the C4D render and you won’t be able to work in ACES correctly and achieve the look you get in Redshifts IPR. Usually want to turn off any aperture adjustments and recreate in post.

  3. In AE, you want to use extractor on your exr sequence so that you are using the beauty pass, not rgb, as the correct linear output, and your IDT adjustment layer should be scene referred/In - utility-srgb-linear to out - ACEScg

Hope that helps.

Hey all,

I just wanted to add to this thread to clear up any confusion for future readers.

Ryan, thanks for your post. I took a look at Casey Drogin’s approach and it seems like a good way of working, especially for his use case where he’s moving on to grading outside of ACEScg.
I think a lot of confusion around ACES workflows is that there are many different paths available that still lead to the same end result.

A couple comments on your post:

HDRIs, by nature, are already in 32bit. In order utilize a proper ACES workflow, those 32bit HDRIs would need to be converted from linear srgb into ACEScg.

Correct, any view transforms, exposure adjustments, or color adjustments in Redshift PostFx will clamp your render, and basically remove all the high dynamic range information. However, the PostFX like Bloom and Streak can be left on; even though they are baked into the final render, they don’t do anything to hurt an ACES workflow.

This is what I originally thought as well, but this is not correct. The EXRs if output correctly, do not need an “sRGB - Linear to ACEScg” transform. Just one adjustment “ACEScg to Output sRGB” (or Rec.709, or whatever your output space is) is needed. Also, either the beauty or RGB pass can be used if the EXRs are output correctly.

I finally got around to making the tutorials I planned on making when originally starting this thread. In case anyone is interested the links to both of those are below.

Thanks for your help, everyone!

ACES in After Effects Part 1:

Comping ACES in After Effects Part 2:

1 Like

Whoa @i_go_by_zak I just watched through your first workflow video.
I now completely understand that other workflow you were going for in the first place. It’s a much more robust way of going about it compared to all AE management off :slight_smile:

Thanks a lot for taking the time and effort to create this for everyone to watch!

1 Like

Shebbe! Thanks so much! And thanks for all your help here! Color management stuff is a lot to get one’s head around. I appreciate you taking the time to look things over.

1 Like

@i_go_by_zak kick ass walkthroughs brother! Kudos for taking the time to break this down. Interestingly, I found a similar photoshop walkthrough using a second LUT adjustment as an inverse transform in order to counteract photoshops inherent rgb correction. It never occurred to me to do the same in After Effects until seeing your workflow. You’ve brought balance to the force. I’ll post a link to that walkthrough once I’m back at my desk for anyone who’s interested.

Lastly I also wanted to mention that aside from Liams life saving converter app, you can actually use an OSL node to convert your textures by feeding the ACES conversion OSL shader into the file path. Saul Espinosa and Panagiotis Zompolas have a Redshift OSL Shader repository going on GitHub where you can download that plus a ton of other ones from. It has an input color space drop down as well in case you’re outputting for a color space other than sRGB. Probably more applicable to Houdini or something. I haven’t done a full A/B comparison yet to Pre converted textures but I’m hoping to soon. Anyways, I’ll post the link to that GitHub page as well. Cheers! Ryan

1 Like

Link to comping in Photoshop:

Redshift OSL Shader Github repo:

1 Like

Oh, one other quick white balance/color matching hack if you don’t have a Macbeth chart or gray card handy. Another fine use of “Difference” blending mode lol. Example he does is in Pshop, but translates 1:1 in AE. Works pretty well for the most part. Otherwise, get Red Giant’s VFX suite, dump it all into Supercomp, and away you go lol.

Video:

Lastly, In regards to compositing your shadow catcher AOV, one way that seems to work pretty well is to duplicate the background footage, set it to multiply and pretty much use the AOV as either a luma matte, or you can use the Set Matte effect (in channel effects I believe). I’m pretty sure the way to composite shadow aov’s in general is to ADD it to the diffuse lighting pass if you’re compositing your render layers to create a beauty pass, so in principle it sort of works in the same way. I may be wrong there, but the results end up feeling a bit more natural and doesn’t demand a ton of adjustment layers to dial it in. Just my 2 cents.

1 Like