Hi there, sorry I know this kind of question has been asked many, many times before but I still struggling to find a concrete answer.
I’m new to the Aces workflow and I want to do things correctly in my projects going forward.
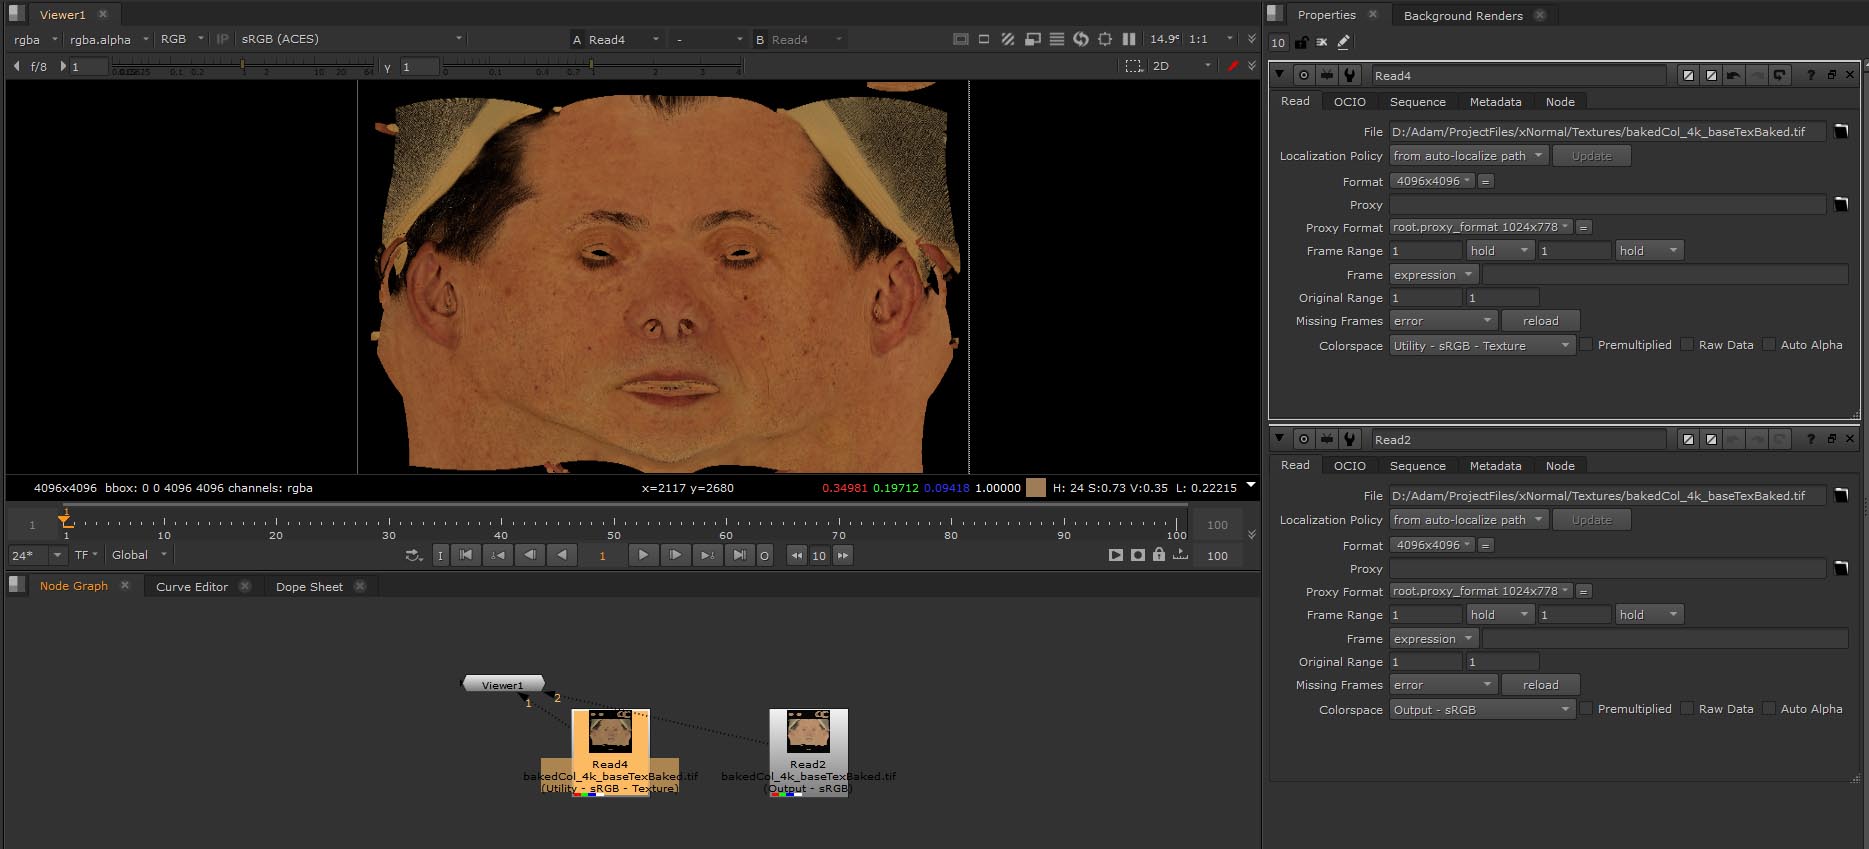
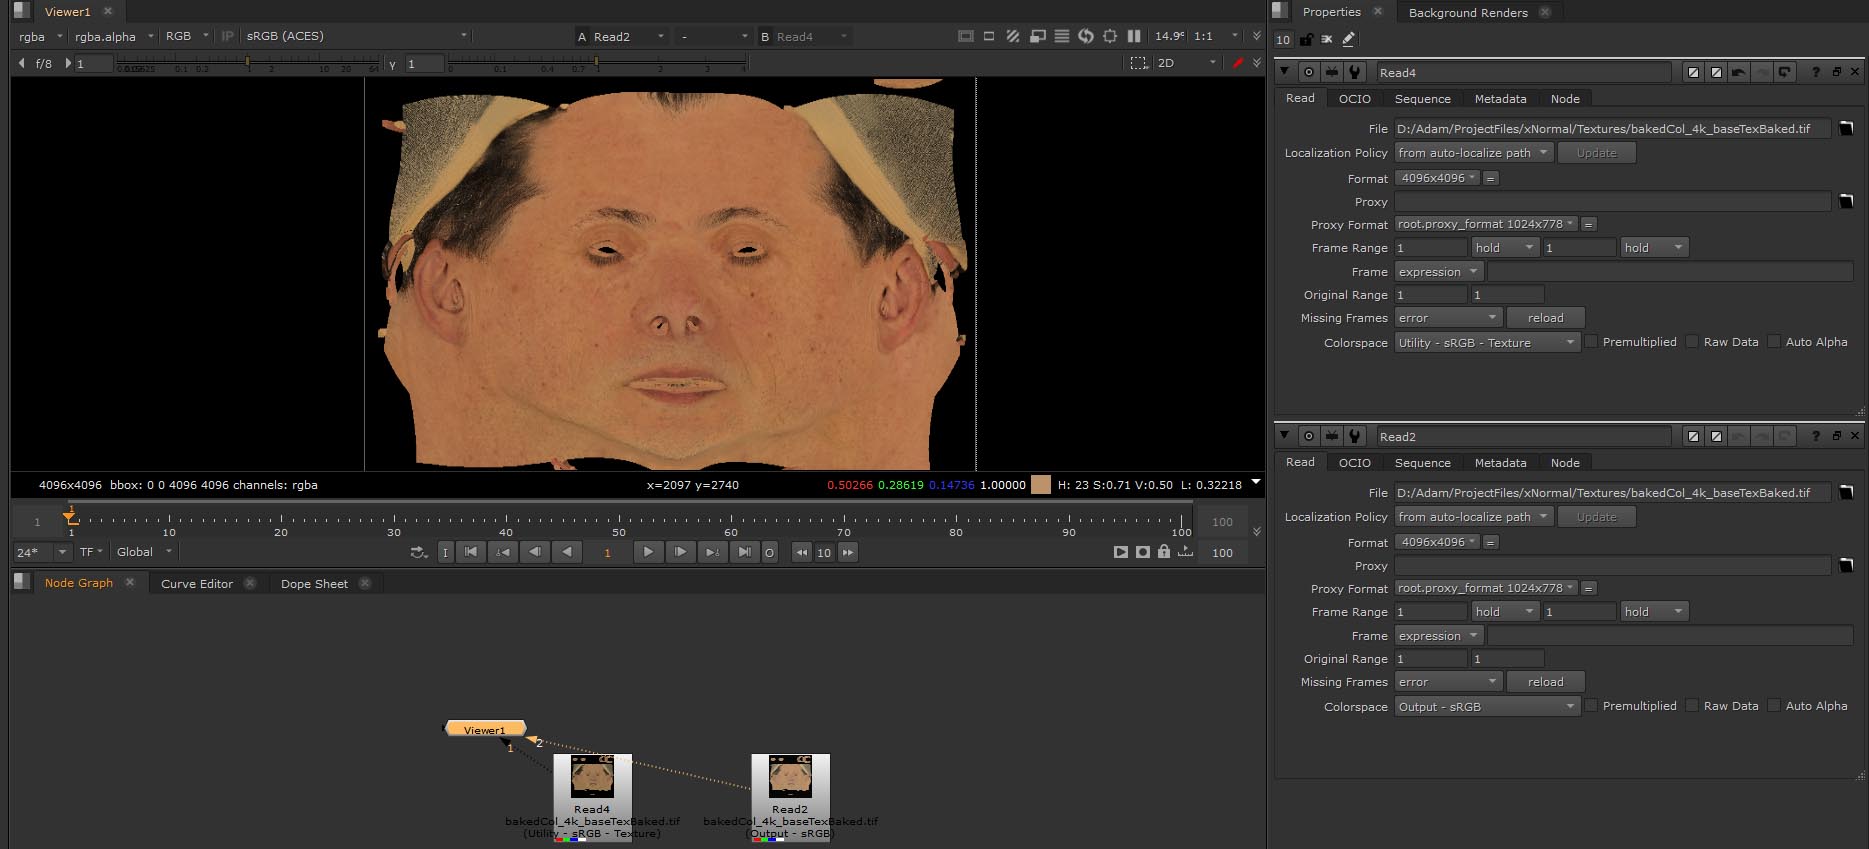
I’m using Aces inside Mari and nuke, I’m bringing in a 16bit srgb tiff file in with the Utility-SRGB-texture IDT applied. The first image is how it currently looks under srgb (Aces). The second image is how its meant to look or how it is meant to look on an srgb monitor. I this example I used the Output-sRGB IDT (although I know this isnt a good road to go down)
My two questions are, if the first image is in fact correct and how its meant to look under Aces, how is precision texturing meant to be done in mari for example when the values are so dark, or is this just a perceptual thing on how the user thinks the textures should look, (skin in this example) and needs to overcome.
Looking at @ChrisBrejon Albedo chart for ACEScg. The Light skin example has a Luminance of 0.323 which is what the texture has with the Output-sRGB IDT applied. But with the Utility-SRGB-texture IDT applied it, its around 0.222. Should I be gaining or exposing this texture to bring it more in line with how it was meant to be viewed?
The second image is indeed how it looks on an sRGB monitor but nothing says that this is the correct appearance. Here, you are effectively looking at a single shading component from a complex appearance modelling shader, e.g. a sub-surface-scattering model.
Playing the devil advocate for a second, and because it was brought in a recent meeting, I think there would be value to distribute a pure sRGB View Transform in the ACES Config for the purpose of viewing technical data, e.g. filtering assessment, anti-aliasing evaluation, etc…
BTW, Output-sRGB is not an IDT but an ODT that you happen to use as a decoding transformation which nullifies the effect of the sRGB (ACES) View Transform which happens to be… Output-sRGB
In a scene-referred workflow, you typically adjust exposure all-the-time to ensure that your work is looking great at all the luminance levels.
The sRGB inverse EOTF puts 18% gray at about 46% while the sRGB (ACES) ODT will put it at about 36%, so it is indeed dimmer to what you are most likely used to. Some studios apply a pre-exposure gain to their imagery, but it is entirely subjective as their are no rules stating what the default exposure should be nor where perceptual mid-gray should be anchored at.
This is a great question! A few things to keep in mind, I would first ask Jeremy if he has a still of the ColorChecker Classic to go with the images. The still will inform your decision as to whether the diffuse texture is too dark or not. In the absence of that, it is hard because human skin reflectance varies a lot:
So what is left is your artistic judgment, if you feel it is too dark and you don’t have a reference to compare with, there should not be an issue with increasing the gain to your liking.
Also, keep in mind that the reflectance given by the ColorChecker Classic is an average of total skin reflectance (both diffuse and specular components that are not separated in reflectance measurements) while what you are looking at is a polarised photograph that is missing almost the entire specular contribution, thus it will always be lower than a measure you get from a spectro-photometer for example.
Thanks for such a great and detailed response Thomas! This has really cleared up my understanding a lot.
If I can hold of the colorChecker from Jeremy, I will post my findings here.